I never expected to grow as a parent from a haircut. I never thought a mohawk would teach me anything. Man, was I wrong. My 9yr old daughter had been asking for a mohawk for quite some time. I kept putting it off. My own insecurities and anxiety wouldn't let me say yes. I wanted to. I desperately wanted to be the parent that let their daughter get a mohawk, or let her son pierce both ears. I don't believe in gender lines. I have worked hard to foster individuality and self love and acceptance in my children. But seeing it be put into play? I wasn't ready for that. Finally, one beautiful Sunday afternoon, I stomped my feelings down enough to let her get her mohawk. And I sure am happy I did.
My daughter is tender hearted. She is energetic, but rather meek. She is kind, and gentle. And until she got her mohawk, I didn't see her as brave. Not in the sense that I see her in now. It takes a lot of guts to stand up to society and say "I'm going to do what I want, and I don't care what you think". Because she does care. She cares a lot. The bravery it took to stomp down her OWN feelings of insecurity and anxiety is nothing short of incredible. We talked at length about the looks and comments she may get. So far she has only gotten 1 rotten response, but it was from a person I fully expected to be rotten about it, and so did she, so her feelings weren't too bruised. Most people have told her it is awesome, and adorable. I have seen confidence in her the last 24 hours that I have not seen in a long time. I see a light in her eyes that hasn't been this bright before.
I wanted so badly to shelter her from how cruel people can be. But I quickly learned that I cannot raise my children to be themselves, and confident, and adventurous, if I don't LET them be those things. Words only mean so much. Life experiences is where the real learning happens. I need to let my children explore (to extent) while I am closeby and able to comfort and guide them, and reassure them that they ARE awesome, and special, and smart, and beautiful. So bring on the mohawks, and the liberty spikes, and funky hair colors. Bring on the horrid music, the torn knee jeans and faded t-shirts. Bring on any other paths my children wish to explore. They are brave, and bold, and beautiful, and I am so thankful they are here to teach me such wonderful lessons.
To the world, please be kind to children finding their own way. Don't tell them their choices are awful, or ugly, or stupid, or wrong. Build a bridge, not a wall. To my brave daughter, I love you very much. Never let the world force you to be someone you don't want to be. Always be your beautiful self.
Monday, March 31, 2014
Wednesday, March 27, 2013
My open apology to Christians.
I judge Christians based on nothing more than their religion. I realize this is wrong, and I apologize. I was hurt deeply by many people who associated themselves as Christians, and have punished others for their meanness. I have also witnessed others become victims of peoples' misplaced sense of faith and their "obligation" to cast stones and point out other peoples' sins. It has only been within the last few years that I have found people who truly live according to the Word, and strive to love all people, regardless of their perceived wrongdoings. In my own personal search to becoming a better person, I am trying to pinpoint my own shortcomings and correct them. So to my Christian friends, I am sorry that I have judged you unjustly. I apologize for any hurt feelings I have caused. Thank you for being my friend.
Saturday, March 23, 2013
Keep the invitations coming!!
As humans, we always want to feel included and as though our presence matters. It seems, however, when we become mothers, that we often stop being invited to things. People assume we'll say no because we can't find a sitter, don't want to leave our babies, or just can't come to whatever at that time. And you know what? You are probably right. But please, DON'T stop inviting us! The sentiment that our presence is desired is important. And we won't have the level of obligation forever that we have now. Eventually we'll feel secure leaving our kiddos with a friend, family member, or babysitter, or our kids will be old enough to be left with a sibling, or even by themselves. And as soon as that happens, we'll be back out on the social scene. But until then, please continue to keep us in mind!
Tuesday, April 17, 2012
Adventures in chickens.
I've wanted chickens ever since I fell in love with a rooster named Hector. This year, we decided to make this a reality. My husband was resistant, but I was PERsistant. Haha. I started saying things like "When I get my chickens", and finally he just gave up. Really, he will thank me for badgering him soon. Anyway, I got up one morning and headed to Tractor Supply Company for 6 baby chicks. It was love at first sight!! Even my infant daughter loved them.


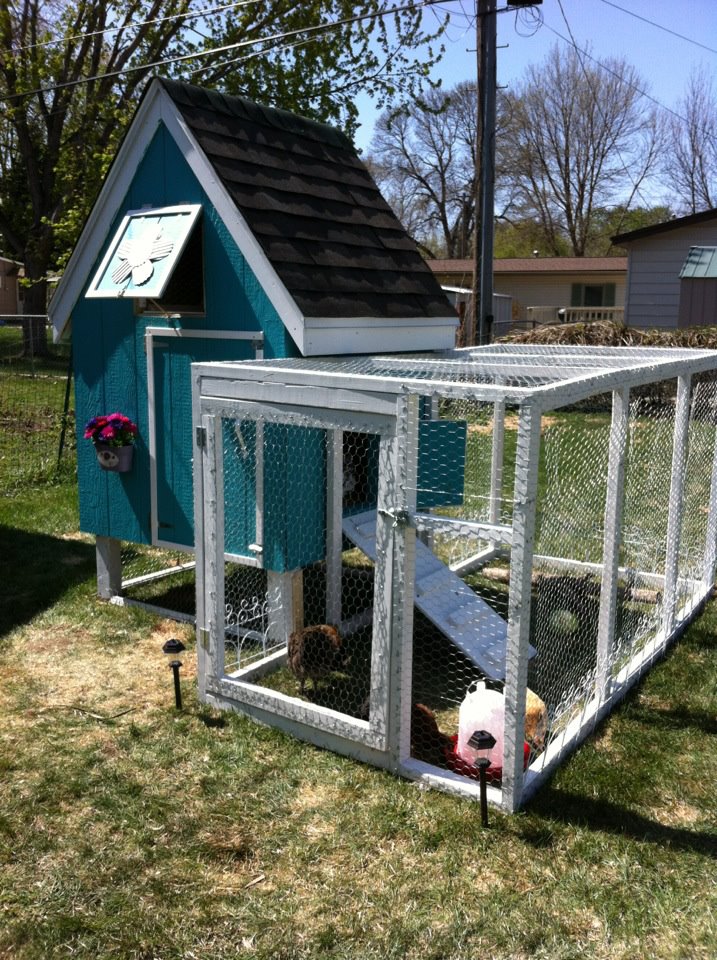
After a few months (and a lot of stress) our chickens were finally getting their coop.


At last, our ladies were home!!


 And today, one of our new chickens, a Silkie named Penny, laid us a perfect egg in one of the nesting boxes. Thanks, Penny, (On the left.)


At last, our ladies were home!!


Saturday, March 31, 2012
Who cut the cheese? Part 1
I love cheese. Do you love cheese?
First I will tell you how to make yogurt. In your crockpot!! The yogurt can then be used to make cream cheese.
This is all you need:

1/2 gallon milk (We get raw milk, but you can use pasteurized. Just make sure it is not ultrapasteurized.)
1/2 cup live culture yogurt. ( I realize it seems counterproductive to buy yogurt to make yogurt. Go with me on this, K?)
1 crockpot
1 towel
That's it. That is ALL you need.
OK, pour the 1/2 of milk into your crockpot and turn it on low for 2.5 hours.
When the 2.5 hours is up, unplug it and let it sit for 3 hours.
When that 3 hours is up, remove 1-2 cups of the milk from the crockpot, place in a bowl, and mix well with the 1/2 cup yogurt. Put back into the crockpot and stir well. Place the lid back on the crockpot, put the towel tightly over the top, and then let sit for 8 hours.
When the 8 hours is up, put it into the container of your choice, and stick it in the fridge for 24 hours to set.
THAT'S IT!!!
NOW, save 1/2 cup back to make more yogurt.
Eat the yogurt you made and the starter yogurt from the store. As long as you have that 1/2 cup from your homemade stuff, you can eat all the yogurt. Yum!! This yogurt is good for approximately 7-10 days.
In part 2 we'll use this yogurt to make cream cheese.
Time for some mozzarella!!!
This is what you need for mozzarella.

1/2 gallon milk (Once again, we use raw, but you can use any kind of milk but ultrapasteurized.)
1 large pot
1 glass bowl
1/8 tsp citric acid (I purchased this in powder form at my local co-op. It's available in the canning section of most grocery stores, and also comes in liquid form. You can use lemon juice if you don't have any citric acid.)
1/8 tsp rennet (I also got this at the local co-op. I use vegetable rennet. If you prefer animal rennet, it is much harder to come by. Also, if you are GMO wary, make sure the veggie rennet you buy is not GMO.)
1/4 cup cool water
food thermometer
slotted spoon
colander (not pictured)
long knife for cutting the curd
First, dissolve 1/8 tsp in 1/8 cup cool water and add to the milk and stir. Then pour the milk into the pot. SLOWLY heat to 90 degrees. This is the hardest part. Keeping a very close watch on the temp. While the milk is heating, mix the 1/8 tsp rennet into the other 1/8 cup water. Once the milk has reached temp, take it off of the heat, add the rennet, mix slowly, and then cover and leave alone for 5 minutes. After 5 minutes, check the curd. It should look like this:

If it doesn't look like this after 5 minutes, give it a few more. Once you've achieved thick curds on the top and whey underneath, use the long knife to cut the curds into small squares. You want to make a checkerboard in your curds. Now put back on the heat and SLOWLY heat to 105 degrees while stirring. Once temp is reached again, start pulling the curds out of the whey and place into a colander. Once all of the chunks are transfered, start gently pushing the curds to squeeze additional whey out. Like this:

Once all of the whey is squeezed out, microwave it for 1 minute. Just do it. Then squeeze MORE whey out. Now knead the cheese like you would bread. Microwave for another 30 seconds, and continue squeezing and kneading. Now it should start to stretch. Like this:

Now roll it into a ball and knead and work until it's a smooth, shiny ball. Now eat it. Yummy!!

DO NOT THROW AWAY THE WHEY!!! In part 2, I will show you how to use just the whey to make ricotta cheese.
We will also be using the yogurt to make cream cheese.
Go make some cheese. Your tummy will thank you
If you need additional mozzarella help, go here. She's the "cheese lady". This is the recipe I went off of.
http://www.cheesemaking.com/howtomakemozzarellacheese.html
Friday, March 30, 2012
Junk food be damned!!
OK, so trying to prepare for my 11yr old to have his tonsils and adenoids removed, I asked people on my Facebook what foods they would recommend to help with recovery. Many people commented, or messaged me with the usual things. Popsicles, ice cream, Jello.... We eat a whole food, organic diet the majority of the time. My child is not used to junk food. It seemed almost mean to assault his body with high amounts of sugar, artificial dyes, and in general, a lack of nutrients, when his immune system was vulnerable following surgery. I started digging for healthier options. Various people pointed me towards great options.
These are the things I decided on:
Organic applesauce
Avocado chocolate pudding
"Jello" made with agar agar instead of gelatin
Banana "ice cream"
Homemade chicken stock
Sherbet (This was the least healthy option on the menu.)
Organic, frozen fruit juice "popsicles"
Avocado strawberry "fluff"
We are same day as surgery so far, and this has been the consensus:
The applesauce is yummy.
The avocado chocolate pudding is "delicious"!
We haven't tried the banana ice cream yet.
The homemade chicken stock is not his favorite, but he is willing to drink it in order to have more treat type stuff.
The sherbet is a favorite, but he understands that there are better options available, and so far has chosen them. He had one small bowl of sherbet today.
Organic, frozen fruit juice "popsicles" are tasty.
Avocado strawberry fluff has also not been tried yet.
The recipe for avocado chocolate pudding is as follows:
1 avocado
1 banana
1/4 cup cocoa powder (I used 100% natural, non-GMO cocoa powder)
1 cup milk alternative (I had hemp milk on hand, so that is what I used.)
2 tablespoons honey
Place all ingredients in blender and blend until smoothe. I used an additional 1/2 banana because it was pretty runny. The hemp milk did not make it taste horrible, thankfully.
The agar agar Jello alternative recipe is as follows:
4 cups liquid of choice
4 tablespoons agar agar. For those of you unfamiliar with agar agar, it is dried seaweed flakes. It is also EXPENSIVE.
Mix both ingredients in a saucepan and bring to a boil. Reduce heat and simmer while stirring for 5 minutes, or until flakes are dissolved. Place in bowl and chill in refrigerator.
Homemade chicken stock is also VERY EASY to make and is MUCH better for you than the sodium and artificial ingredient filled stuff you buy at the store.
What you need for chicken stock:
1 whole, uncooked chicken OR the leftover bones from an already cooked chicken
1 gallon of water
2 carrots
2 celery stalks
1 onion
1/4 cup apple cider vinegar (raw and unfiltered)
1 bunch parsley
Place the water, chicken/chicken bones, carrots, celery, and onion (chopped), and apple cider vinegar into a pot, and let sit for 30 minutes. Bring to a boil, and then reduce heat and simmer for 24-72 hours. Add in parsley the last 15 minutes. Strain and place in large bowl in fridge or allow to cool on the counter, covered. Skim the fat from the surface, and then either freeze, or keep in the fridge for up to 5 days.
I will update as we use the other recipes.
Thursday, March 8, 2012
Full crunch ahead!!!
I'm just gonna put it all out there. Let it all hang out. I use cloth menstrual pads. Yep, you heard that right. Cloth. No nasty chemicals, no skin reactions, and no paper waste. It's *awesome*. It's also very easy to do with a good system in place.
I have an assortment of pads in all different sizes, and also a few different materials. I have pantyliners, regular size/flow, heavy, and overnight/postpartum. I even have a few postpartum pads with pockets for a handy dandy ice pack. That was heaven after the birth of my 4th baby.


I'm sure you're asking yourself "What the hell does she do with the dirty ones?". Well...I went and purchased a small 2 gallon sized flip top trashcan and a wet bag made for cloth diaper use. I use the wet bag to line the trashcan, and keep it next to the toilet. I also throw a little baking soda in the bottom to help absorb odors. I would upload a pic, but my camera has decided to only send certain pictures.
When I remove a pad, I put it in the trash can. If it is heavily soiled, I rinse it first with cold water. At the end of the day, they all get thrown in the wash and washed on hot with no fabric softener. If you cloth diaper, you could wash them with your diapers if you want. If it's just pantyliners from every day use, they get put in with the whites.
Any questions? This may very well be the least "gross" crunchblog, so I wanted to get it out of the way. ;)
I have an assortment of pads in all different sizes, and also a few different materials. I have pantyliners, regular size/flow, heavy, and overnight/postpartum. I even have a few postpartum pads with pockets for a handy dandy ice pack. That was heaven after the birth of my 4th baby.

I also have a Rubbermaid container that I keep them in underneath the upstairs bathroom sink. It keeps everything nice and neat, and protected from the elements. It fits perfectly in the cupboard too, so they're out of site from anybody who may wander up there.
I'm sure you're asking yourself "What the hell does she do with the dirty ones?". Well...I went and purchased a small 2 gallon sized flip top trashcan and a wet bag made for cloth diaper use. I use the wet bag to line the trashcan, and keep it next to the toilet. I also throw a little baking soda in the bottom to help absorb odors. I would upload a pic, but my camera has decided to only send certain pictures.
When I remove a pad, I put it in the trash can. If it is heavily soiled, I rinse it first with cold water. At the end of the day, they all get thrown in the wash and washed on hot with no fabric softener. If you cloth diaper, you could wash them with your diapers if you want. If it's just pantyliners from every day use, they get put in with the whites.
Any questions? This may very well be the least "gross" crunchblog, so I wanted to get it out of the way. ;)
Subscribe to:
Posts (Atom)